 NEWS
NEWSEditing Travel Vlogs Like a Pro with CapCut Desktop Video Editor
Jan. 23 2025, Published 1:35 a.m. ET
Travel vlogging has become a popular way to share adventures with the world. Whether you're wandering through cobblestone streets in Europe, hiking the rugged trails of Patagonia, or enjoying tropical beaches in Southeast Asia, capturing and editing stunning travel videos is key to engaging your audience. A professional-quality vlog doesn't just showcase the destination; it tells a compelling story, captivates viewers, and inspires wanderlust. With CapCut Desktop Video Editor, you can achieve all this without needing advanced technical skills or expensive software. Here's how to edit your travel vlogs like a pro using this versatile tool.
Why Choose CapCut Desktop Video Editor?
CapCut is an all-in-one video editing platform that combines user-friendly features with advanced tools, making it ideal for beginners and seasoned creators. With its intuitive interface, vast library of effects, and powerful editing capabilities, CapCut Desktop Video Editor allows you to transform raw footage into polished masterpieces. Here are some reasons why CapCut is perfect for travel vloggers:
Free to Use: Unlike many high-end editors, CapCut offers a robust free version with premium-like features.
Cross-Platform Compatibility: You can edit seamlessly on desktop and mobile, ensuring you're never tethered to a single device.
Customizable Templates: Pre-made templates let you quickly produce professional-looking content.
Advanced Features: CapCut, professional video editing software, has everything you need to elevate your videos from multi-layer editing to keyframe animations and AI-powered effects.
Step-by-Step Guide to Editing Travel Vlogs in CapCut Desktop Video Editor
Organize Your Footage
Before diving into editing, organize your raw footage. Create folders for different scenes or locations, and name your files descriptively.
Import Your Footage
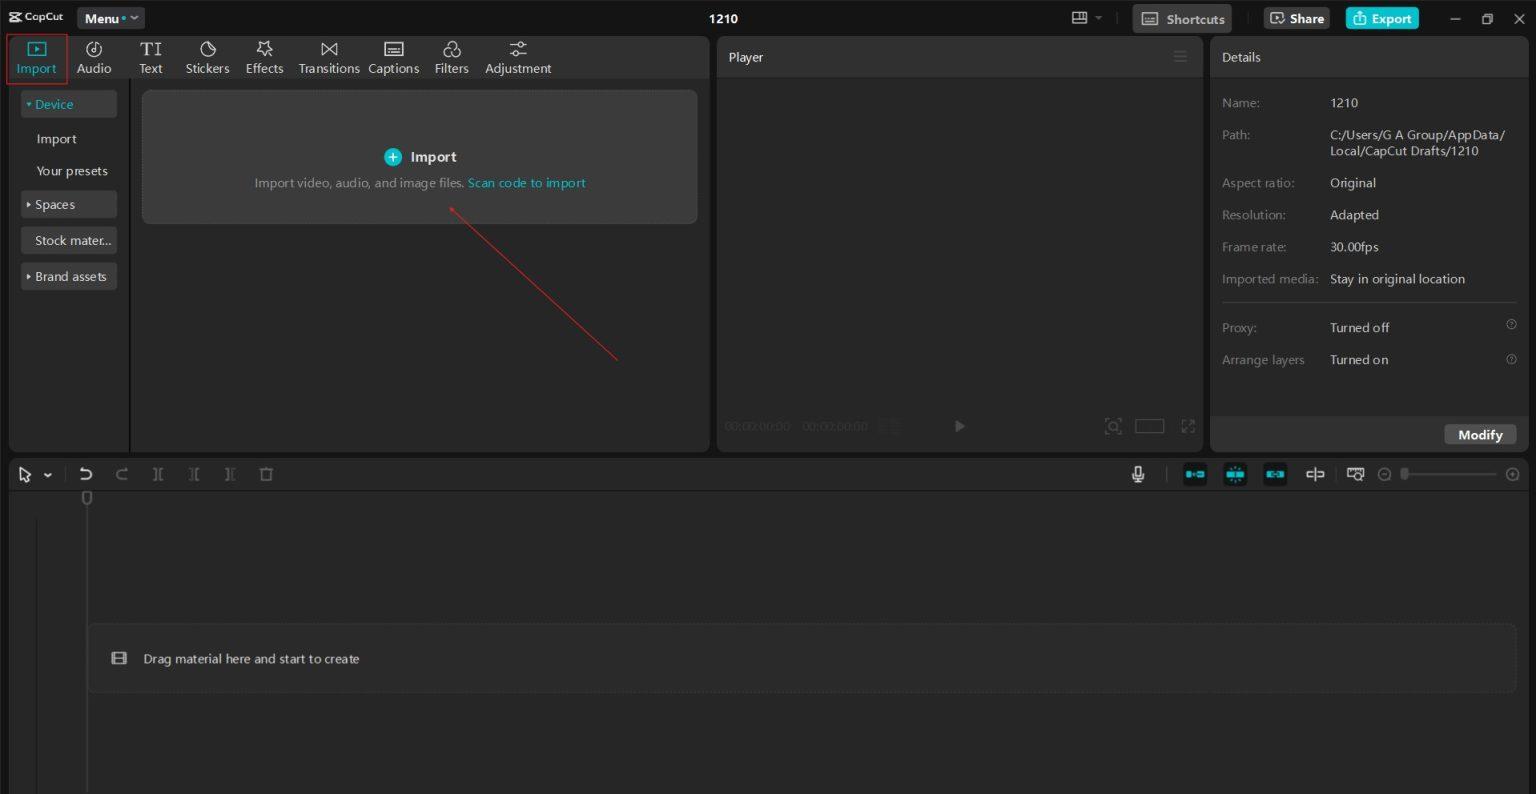
Open CapCut and start a new project. Drag your clips into the media library to import them. CapCut supports many formats so that you won't need additional converters.
Plan Your Story
An excellent travel vlog has a straightforward narrative. Start by outlining your video's structure. For example:
Introduction: Highlight the destination and what the vlog covers.
Main Content: Showcase the activities, attractions, and unique moments.
Conclusion: Wrap up with reflections and a call-to-action, like subscribing to your channel.
Use CapCut's timeline to arrange your clips sequentially, trimming and adjusting them as needed.
Enhance Your Footage with Color Grading
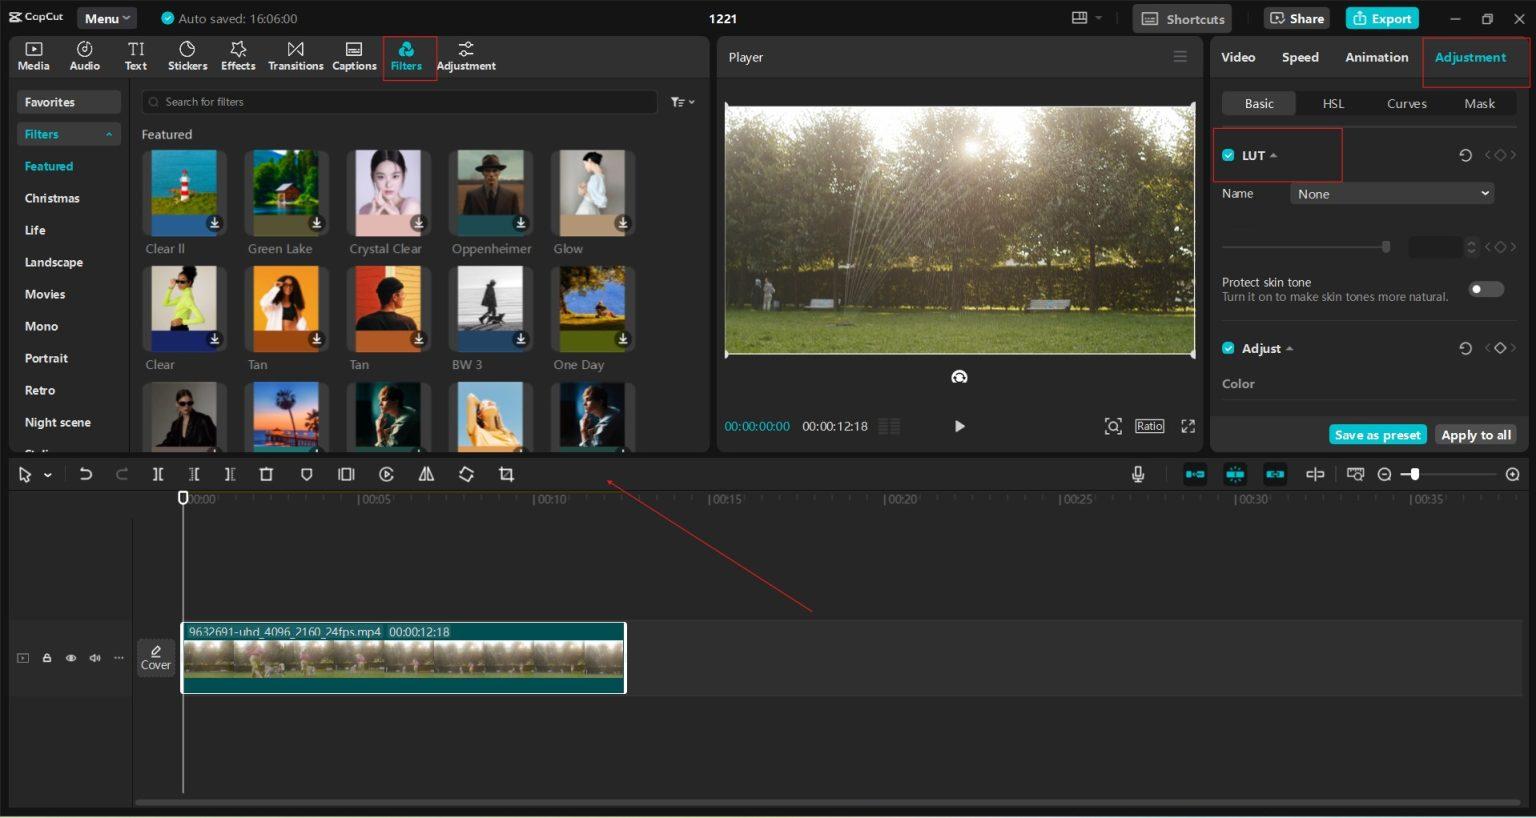
CapCut offers a suite of color-grading tools to make your videos pop. Adjust brightness, contrast, saturation, and white balance to bring out the best in your footage. You can also apply LUTs (Look-Up Tables) for a cinematic look that enhances the vibrancy of your travel destinations.
Add Smooth Transitions
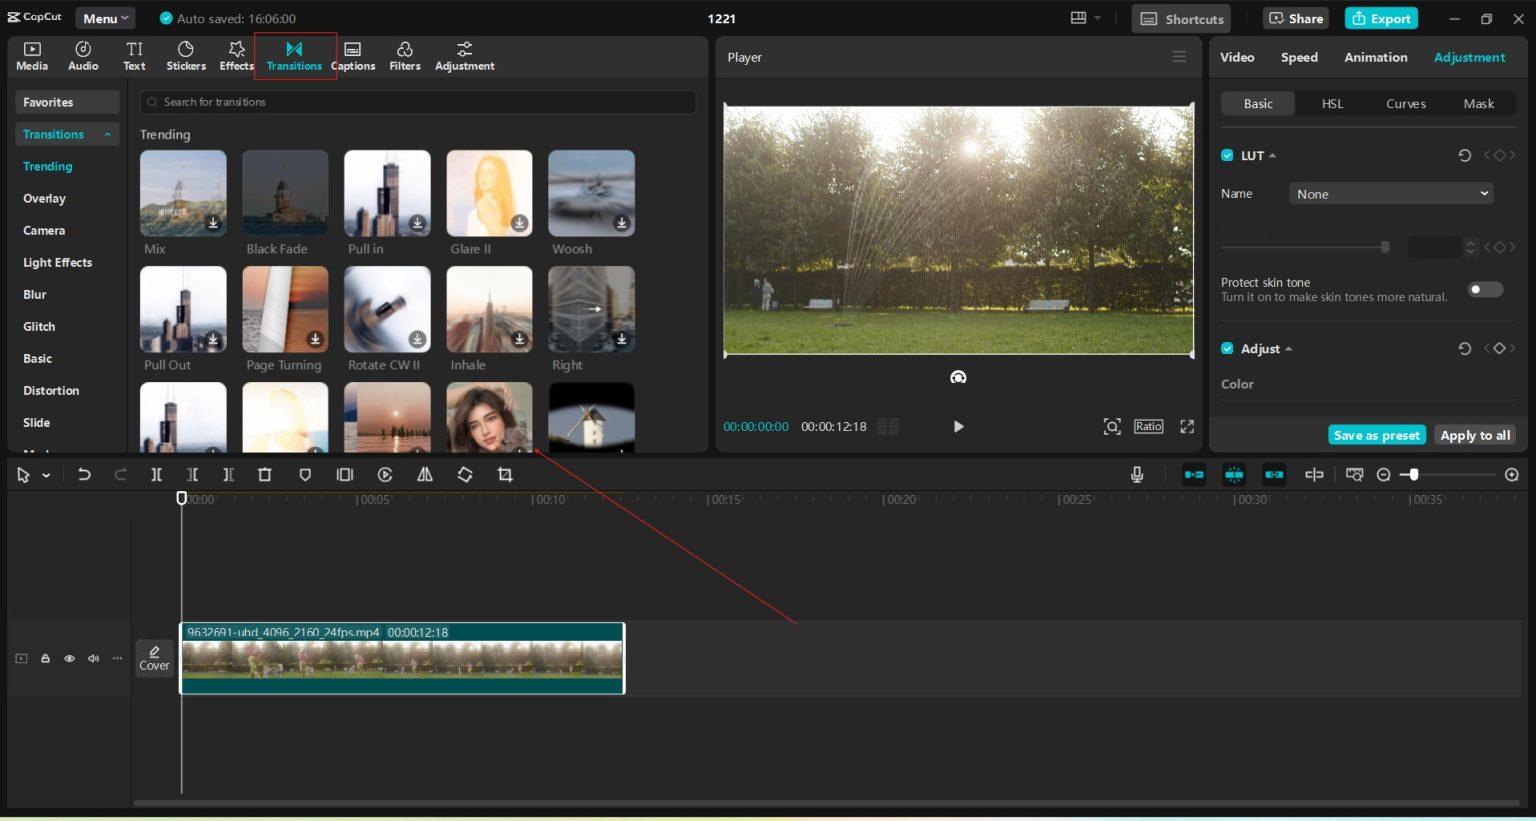
Seamless transitions keep your audience engaged and add a professional touch. CapCut provides a variety of transition effects, including:
Crossfade: Smoothly blend one clip into another.
Zoom: Create dynamic movement between scenes.
Swipe: Add a playful touch for upbeat travel moments. Apply different transitions between clips.
Want OK! each day? Sign up here!
Incorporate Background Music
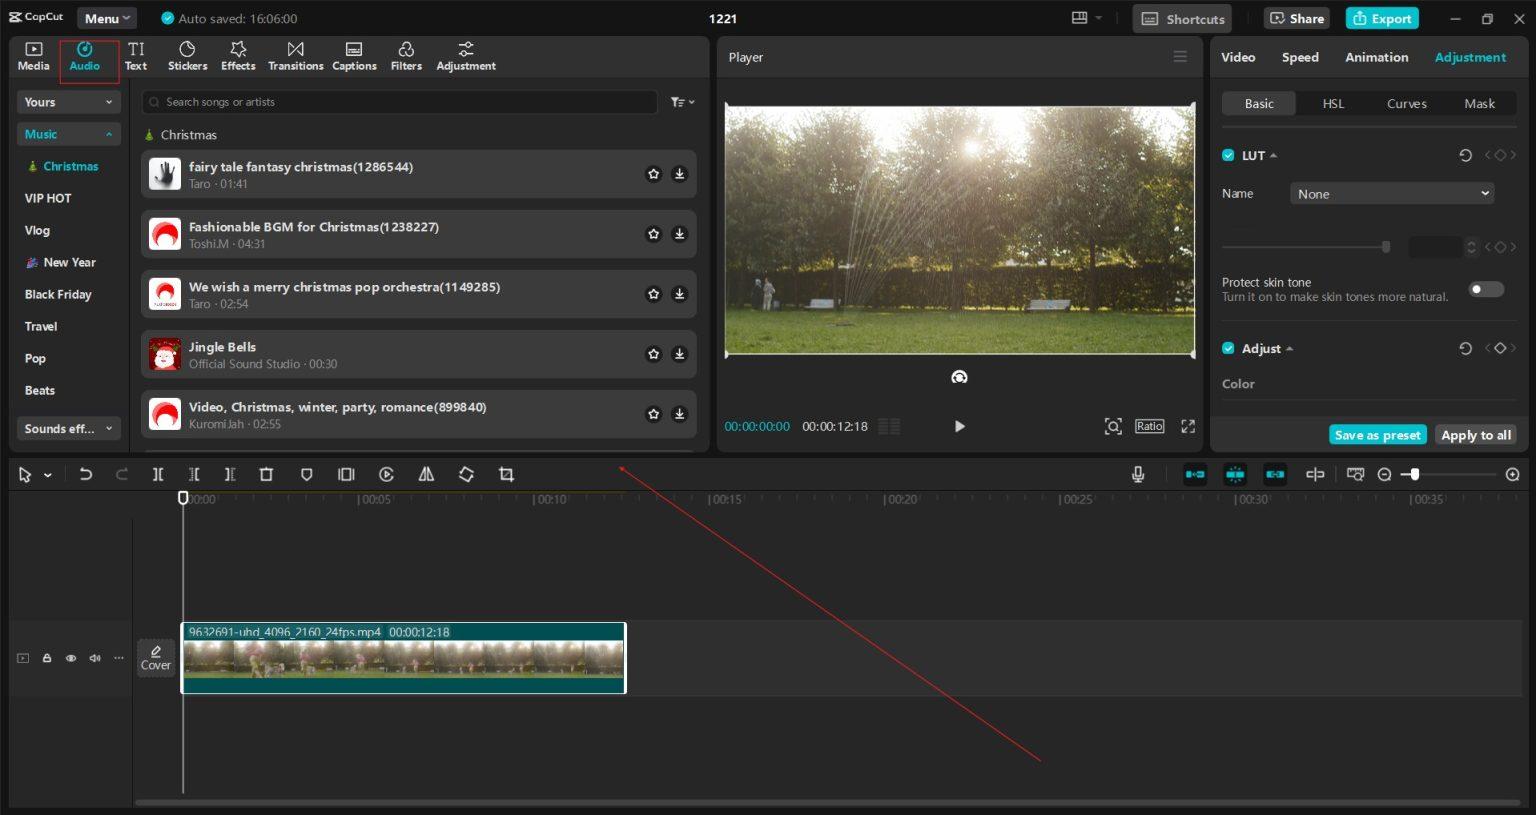
Music sets the tone for your vlog. CapCut's library includes royalty-free tracks spanning various genres. Select music that complements the mood of your video, whether it's energetic for an adventurous hike or calming for a serene beach scene. Sync the music with key moments in your video for maximum impact.
Use Captions and Titles
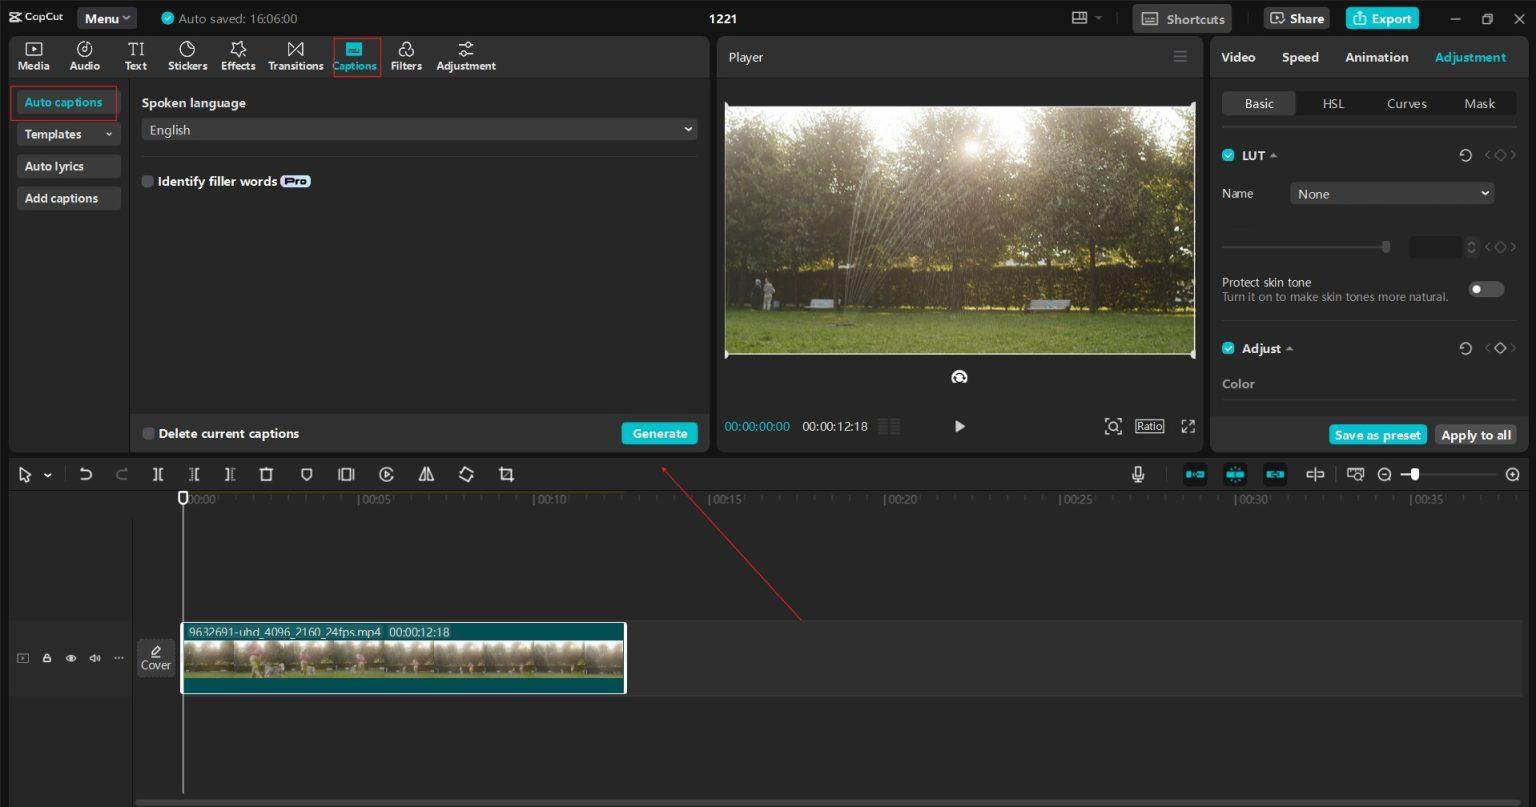
Adding captions and titles makes your vlogs more accessible and informative. CapCut's AI Caption Generator offers a range of fonts, animations, and styles. Use captions to:
Highlight important details (e.g., location names).
Translate local phrases or cultural terms.
Include subtitles for non-native viewers.
Keep text brief and ensure it's legible against your video background.
Leverage Special Effects
CapCut's effects library includes filters, overlays, and animations to give your videos a creative edge. Use special effects to engage your audience. Some ideas:
Time-Lapse: Showcase bustling markets or changing landscapes.
Slow Motion: Highlight dramatic moments, like a waterfall's plunge.
Glitch Effects: Add a modern twist to urban scenes.
Incorporate Voiceovers
A voiceover adds a personal touch, allowing you to narrate your experiences and connect with viewers. Record directly in CapCut or upload pre-recorded audio. Adjust volume levels and use noise reduction tools to ensure clarity. The CapCut Video Background Remover feature allows you to change your video background.
Export in High Quality
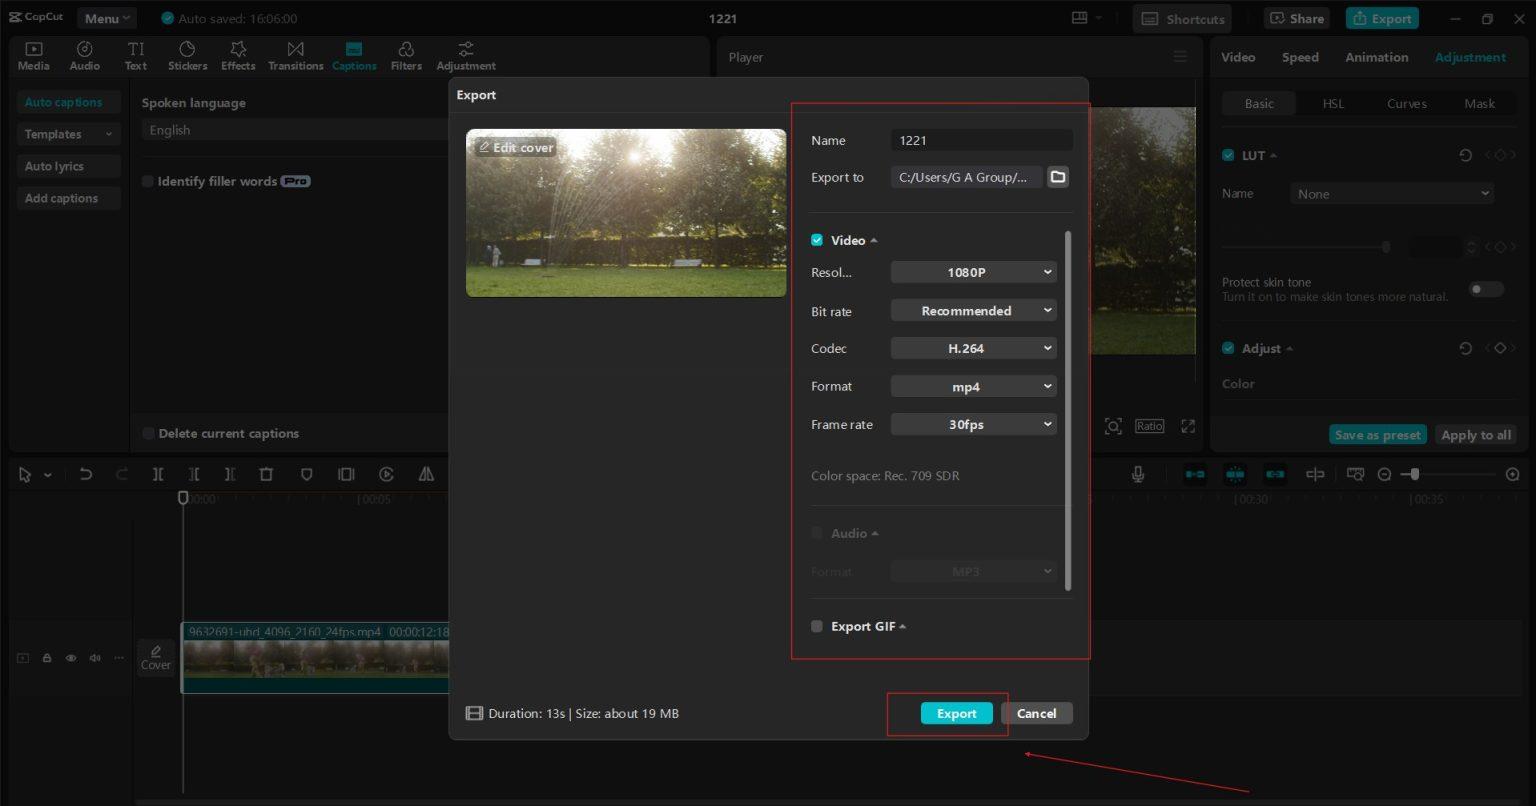
Once your vlog is complete, it's time to export. CapCut allows you to choose the format, resolution, and frame rate for travel vlogs; exporting in 1080p or 4K ensures crisp visuals. Optimize file size for your chosen platform, whether it's YouTube, Instagram, or TikTok.
Pro Tips for Travel Vlogging Success
Keep It Short and Engaging: Short videos are very attention grabbers. Aim for 5-10 minutes per vlog, focusing on the most captivating moments.
Consistency Is Key: Maintain a consistent style and upload schedule to build a loyal audience.
Invest in Good Equipment: While editing can enhance your footage, starting with high-quality recordings makes a significant difference.
Engage with Your Audience: Respond to comments and ask viewers for feedback to improve your content.
Experiment with Trends: Stay updated on social media trends and incorporate them creatively into your vlogs.
Conclusion
Editing travel vlogs doesn't have to be daunting. With CapCut Desktop Video Editor, you have a powerful, easy-to-use tool that enables you to create stunning videos that capture the essence of your adventures. Following the steps outlined above, you can elevate your travel vlogs, grow your audience, and inspire others to explore the world. So, grab your camera, edit, and let your travel stories shine!


